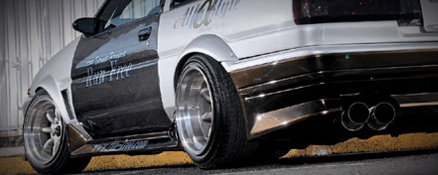
So you’ve finally got those 10.5-inch, negative-offset R.S. Watanabe Eight-Spokes you were drooling after for so many months but now you have to face that question: How do I make them fit?
There’s a few ways to sort it out but the most popular solutions are blister-fenders or ‘bolt-on’ flares. Depending of your choice of flare (N2 TRD, CBY, RunFree, J-Blood, Origin) there are small but very important steps to fitting them perfectly and making sure your car isn’t left open to structural rusting because of it!
Courtesy of Crystal Body Yokoyama, we have the definitive guide to fitting those rear over-fenders.

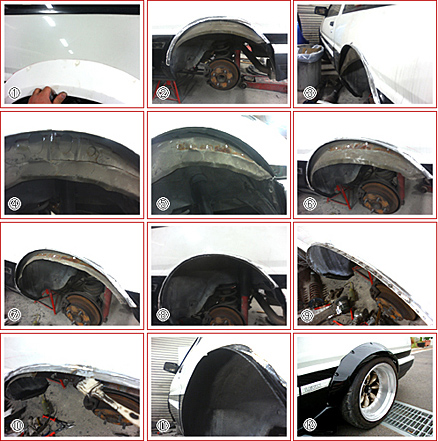
Step 1. Hold the new FRP fender up to the car and over the stock flare and with a sharpie make your cutting mark. (Photo 1)
Step2. Once the cutline has been decided, cut only the outer panel of metal leaving the inner panel intact. Be sure to give an extra 1-2cm of the outer panel to bend flat outwards. (Photo 2 and 3)
Step 3. If any previous damage exists, use a hammer to coax the inner panel back to a nice flare shape. (Photo 4, 5 and 6)
Step 4. Using your choice of cutting tool (grinder, oxy, etc) carefully cut the excess from the inner panel. Be sure to leave enough for the inner panel to meet the outer panel flush, with 1-2cm of overhang to match the extra you left on the outer panel. (Photo 7)
Step 5. Once cut, the inner panel should be massaged to meet the outer panel edge so they come together nice and flush. It is important not to hit the outer panel as this will deform the final result of the entire rear quarter-panel. (Photo 6, 7 and 8 )
Step 6. Spot weld the two panels together at 2cm increments along the flattened edges of the inner and outer panels. (Photo 9)
Step 7. Paint spot sealer onto the entire raw metal face and especially onto the welds themselves. One coat is fine..(Photo 10)
Step 8. Apply rust inhibitor over the entire area and if you are painting prep the surface as normal. Be sure to apply stoneguard onto the inner guard which may have broken free during the body massaging process. (Photo 11)
Step 9. Attach the fender using rivets, screws or bolts to the body. This part is entirely up to your preference of visual appeal. If you plan to mould the flare into the body, use rivets as your body filler of choice (bondo, bog, fibreglass) will mask the holes easier. (Photo 12)
Step 10. Stand back and enjoy the final result. Just look at that dish!


3 Responses to How-To: Rear Over-Fenders